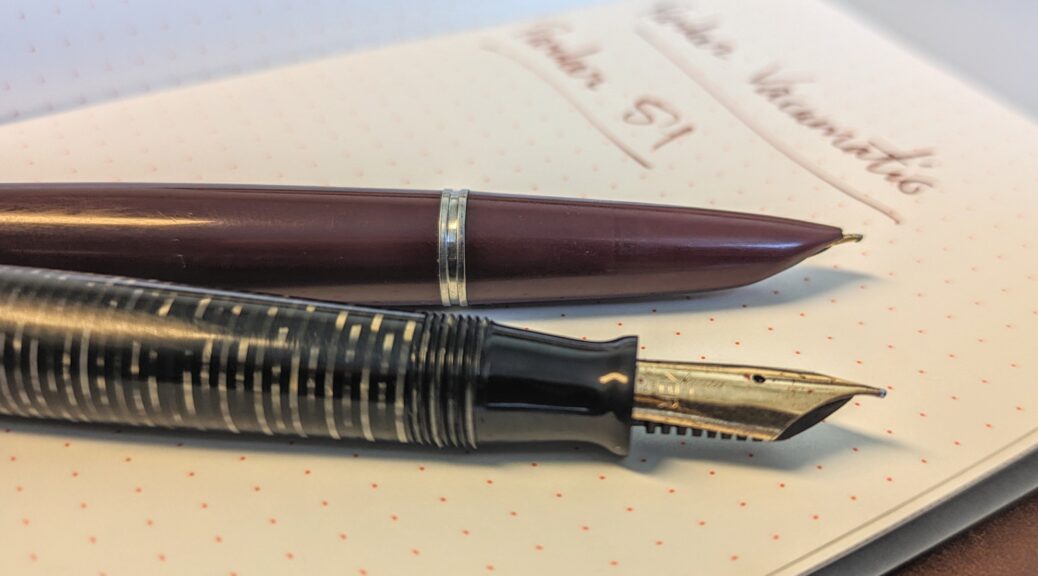
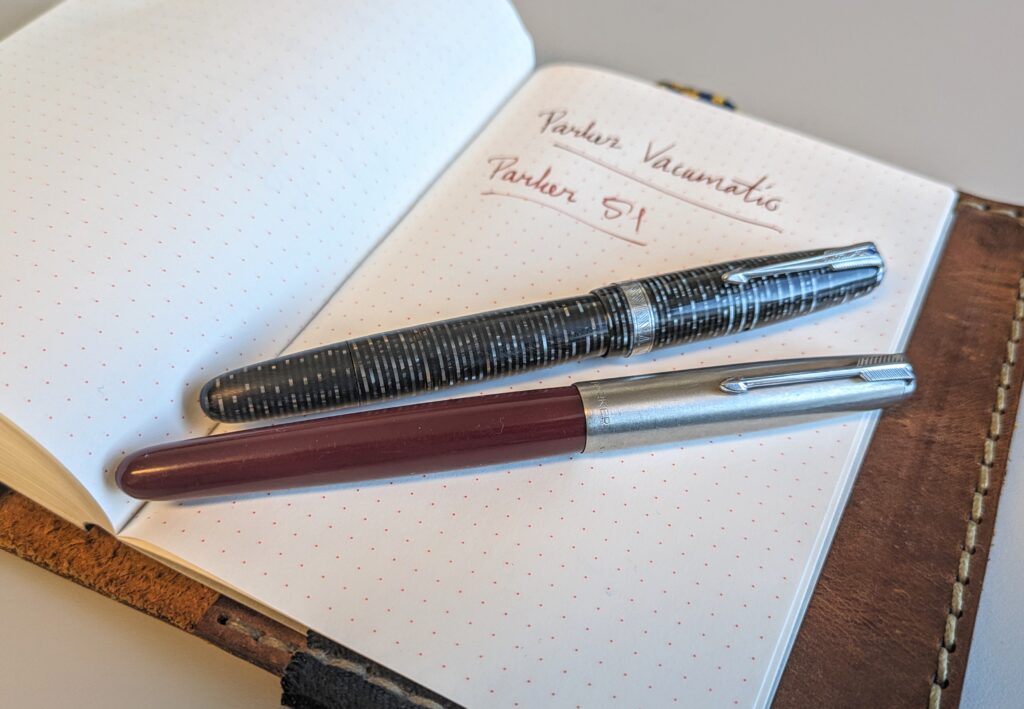
Nibby Sunday – Service and restoration of Parker Vacumatic and Parker 51
A couple of weekends ago I decided to fix up a couple of Parker pens I’ve had lying around for a long time: a Vacumatic and a 51. These are two legendary pen models, which, together with the Duofold, takes much of the credit for Parker in its time becomming the world’s largest and most-selling fountain pen brand. Vacumatic and 51 have very different filling mechanisms, and different considerations that must be taken when repairing them. They are also quite different from most other fountain pens.
Both of these have their own particular challenges, and can be tricky to dismantle if you don’t know what you’re doing. I don’t have much experience with these models myself, but I have repaired pens in my own collection. I’ve also repaired Parker 51 pens for other people on a couple of occasions.
I thought I’d take a look at each of the two pens in this post, and go over how I overhauled them, what went well, and what didn’t go so well. There’s always SOMETHING that doesn’t quite go according to plan…
Let’s start with the Vacumatic.
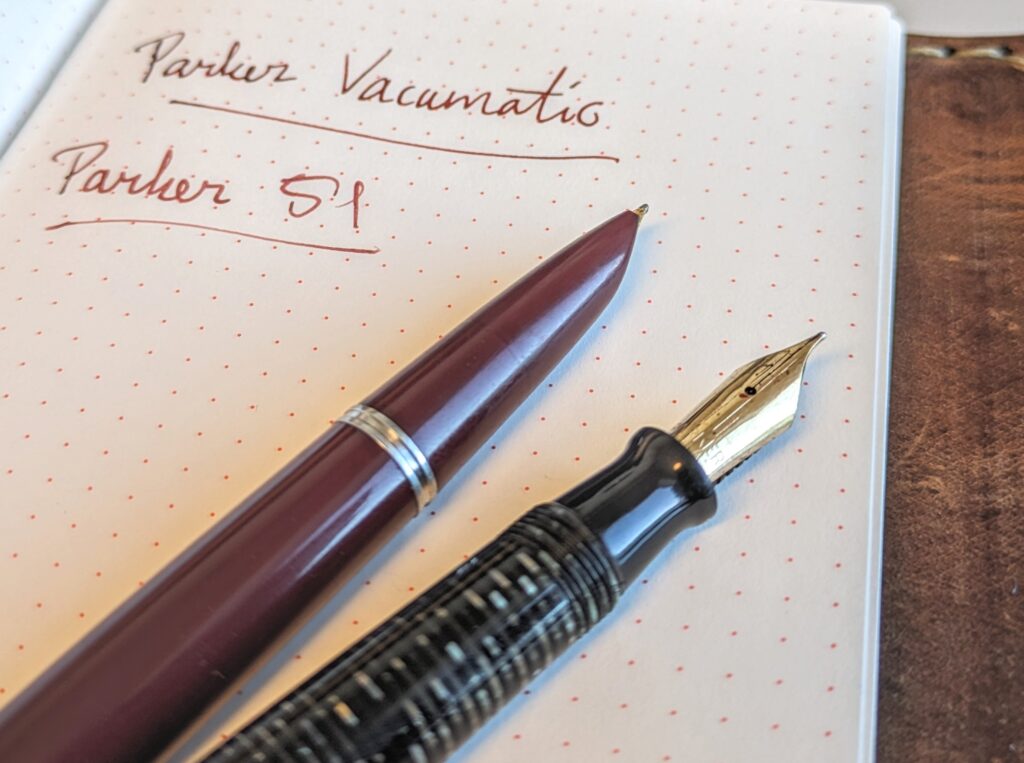
Parker Vacumatic
I’ve had this pen for a long time and have also disassembled and repaired it in the past. When I fitted a new diaphragm to it a few years ago, I used the wrong tool to screw in the pump mechanism. This led to wear on the threads at the back, so that the blind cap at the end of the pen did not sit very well afterwards. Since then, I’ve wanted to replace the pump with a new one. I’ve had the parts and the correct tools I need for this lying around for several years, but it hasn’t been a critical repair, and the pen has been fully usable despite this, so I just haven’t gotten around to it. But now it was finally time!
Disassembly
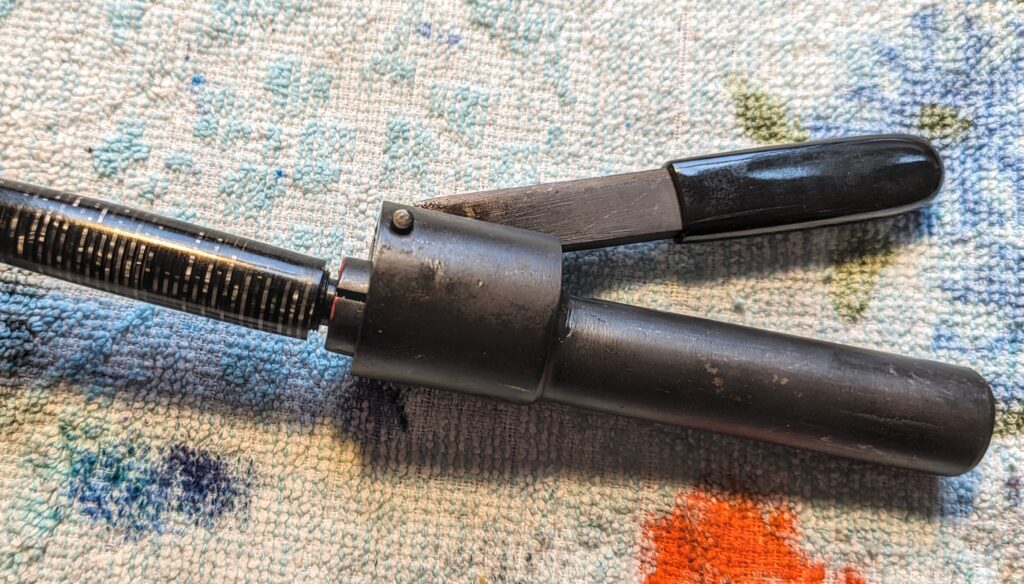
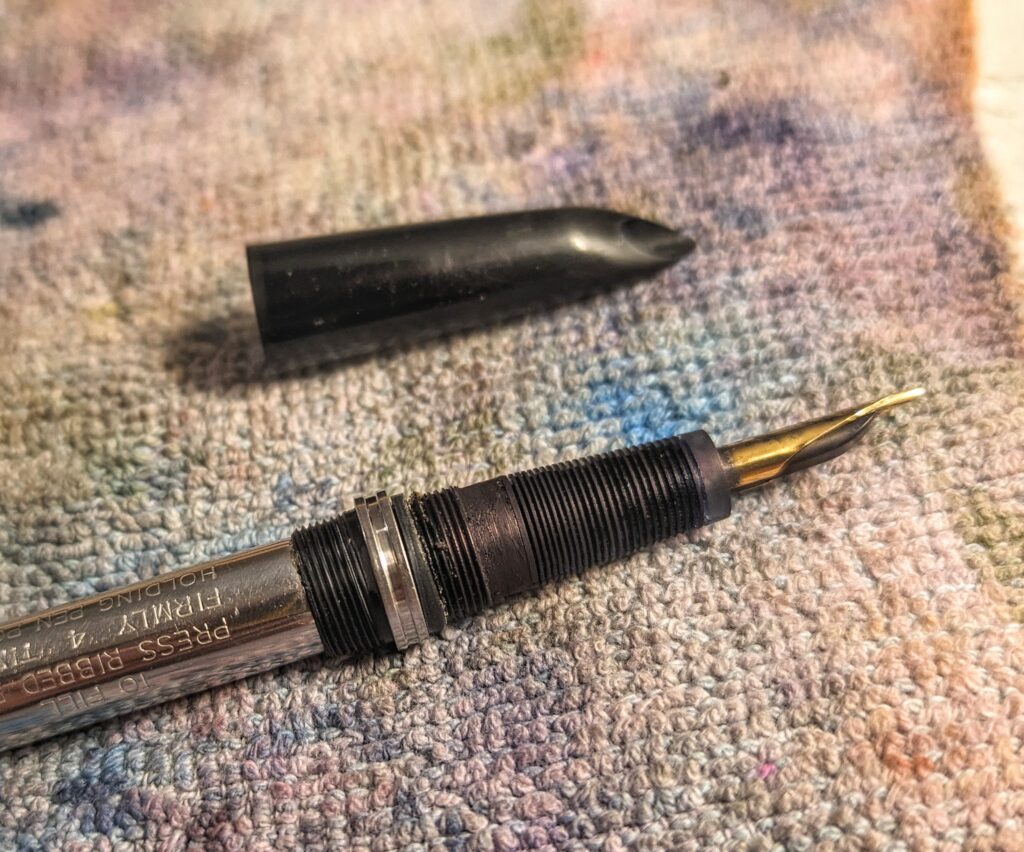
To unscrew the pump on the Vacumatic pens, you need a special tool that gives a good grip around the threads of the blind cap without destroying them. This is what I did wrong the first time I restored this pen. Since then, I’ve acquired a special vacumatic wrench made for this purpose. The wrench have threads on the inside that match the threads on the pen. This allows you to get a firm grip without the risk of wearing down the threads. The pump is often also glued in place, so you might need to use heat to soften the glue and the materials enough to unscrew it safely. Just be careful not to use too much heat, as the pen is made of celluloid, which has a low melting and ignition temperature. I myself use a heat gun on the lowest setting. You can also use a hair dryer, e.g.
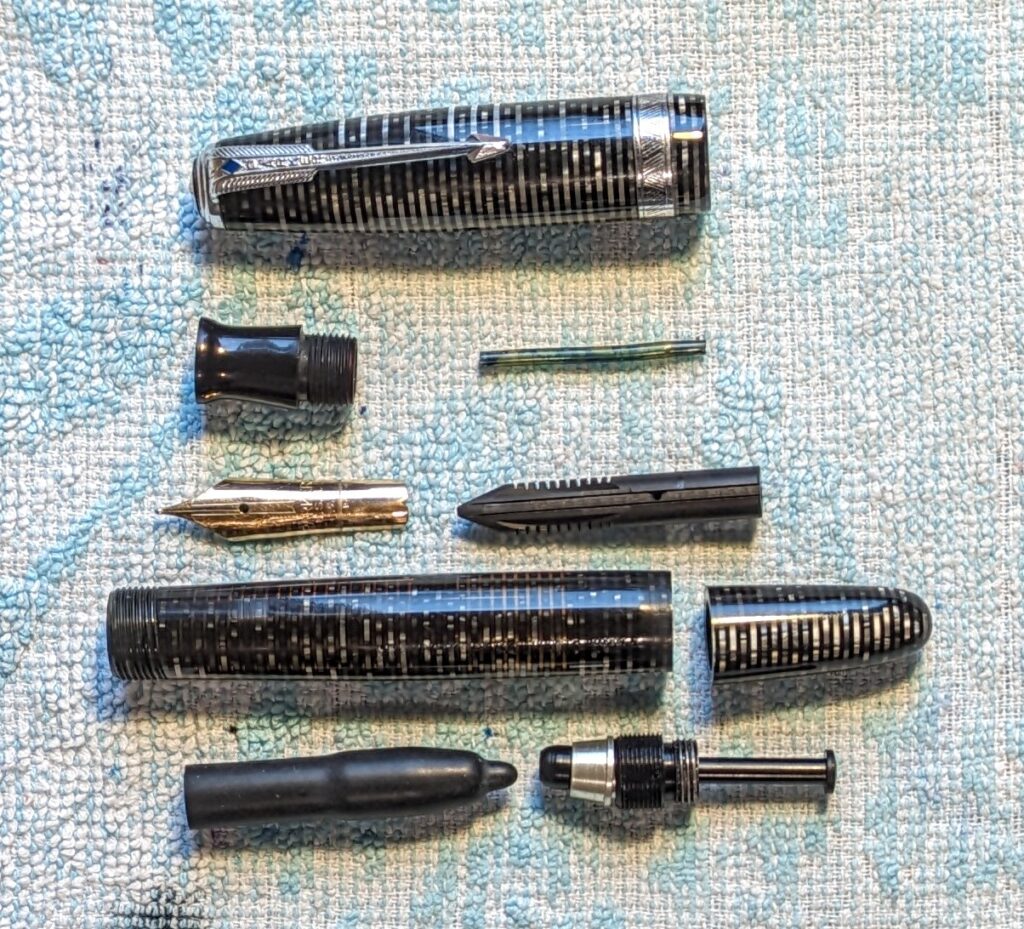
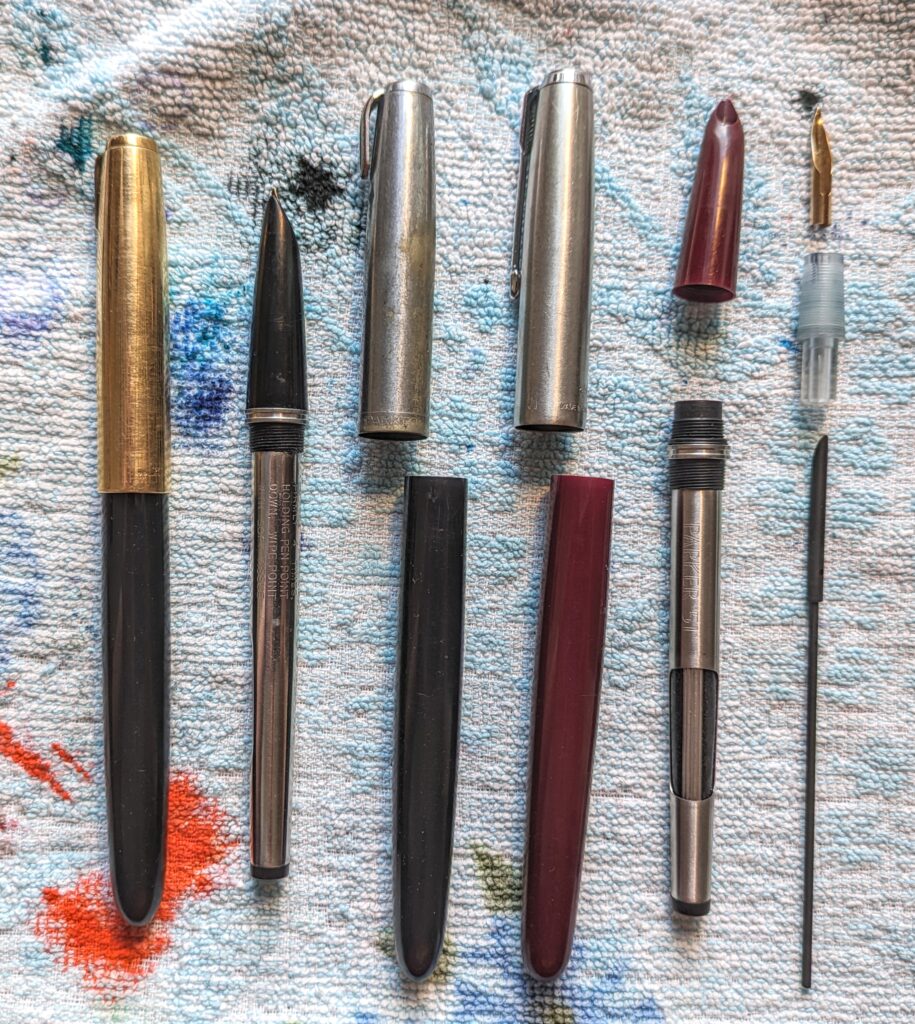
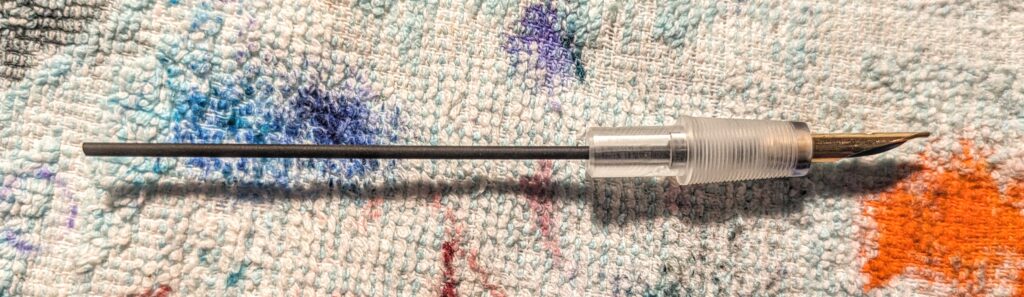
I completely disassembled the pen; unscrewed the pump at one end and the nib section at the other. The nib and the feed could then be knocked out from the back of the section.
Installation of new pump and diaphragm
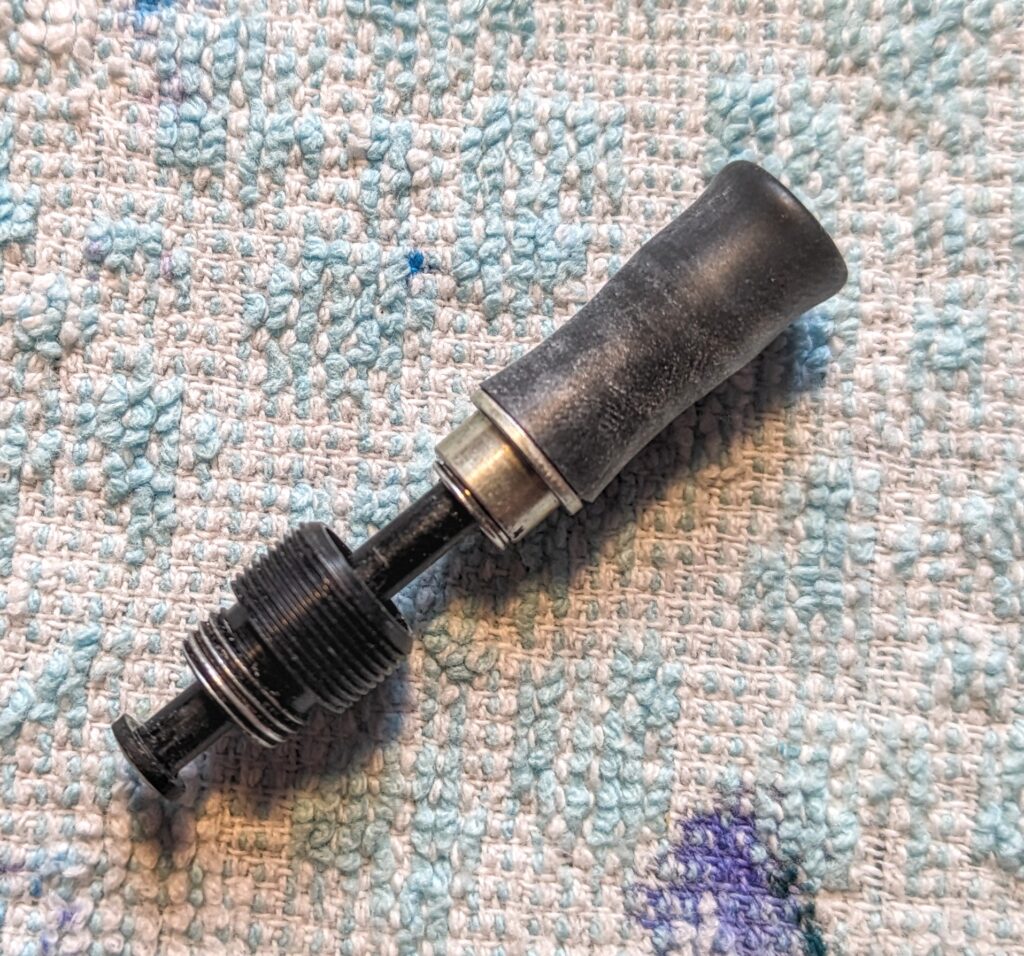
When the pen was completely disassembled, I cleaned it thoroughly, making sure that there was no dirt or residue on the inside of the pen body. Then I prepared the new pump. The first thing I had to do was to mount the diaphragm on the pump. This is a rubber sac with a nipple at the very front where a small plastic pellet is located. The rubber sac was cut to approx. 3 cm long.
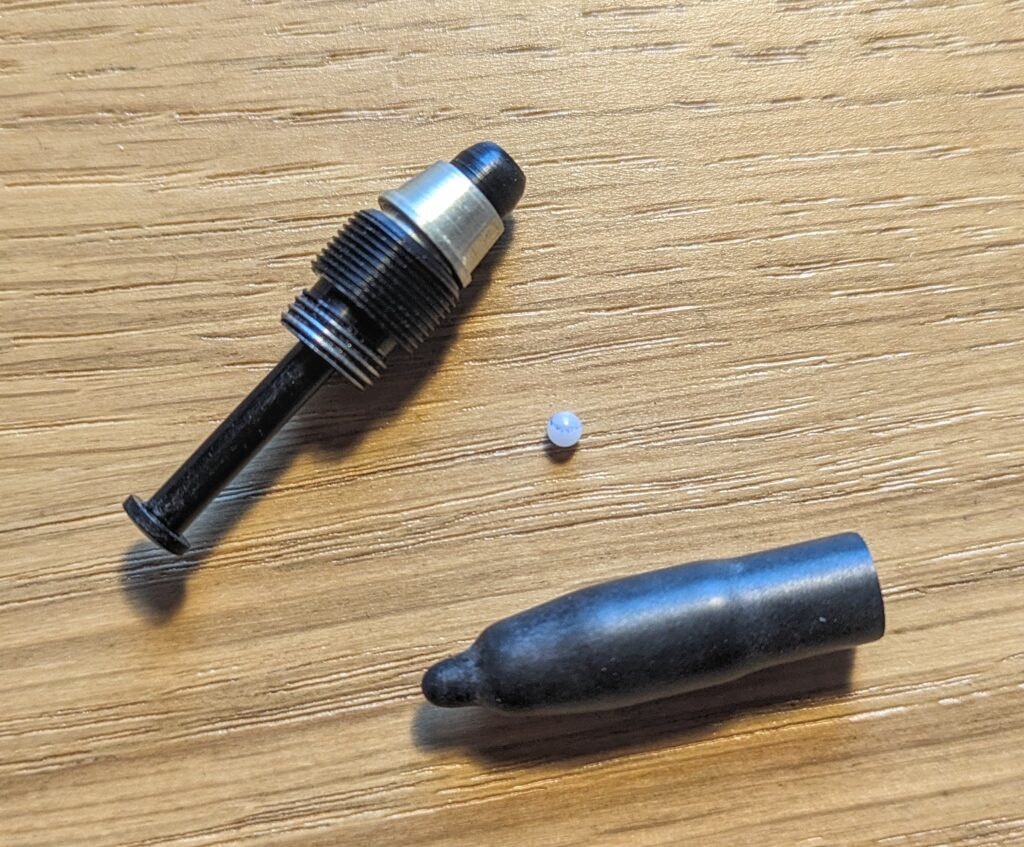
I then used another special tool, a pellet pusher, which is a small metal rod with a litte dent at the very front (you can use a regular pin as well, as long as it’s thin enough), to push the plastic pellet into the front of the pump. When done correctly, the sac should hang firmly in place in front of the pump without the need to glue it. Make sure that the sac aren’t at an angle from the pump, but that the whole assembly is straight.
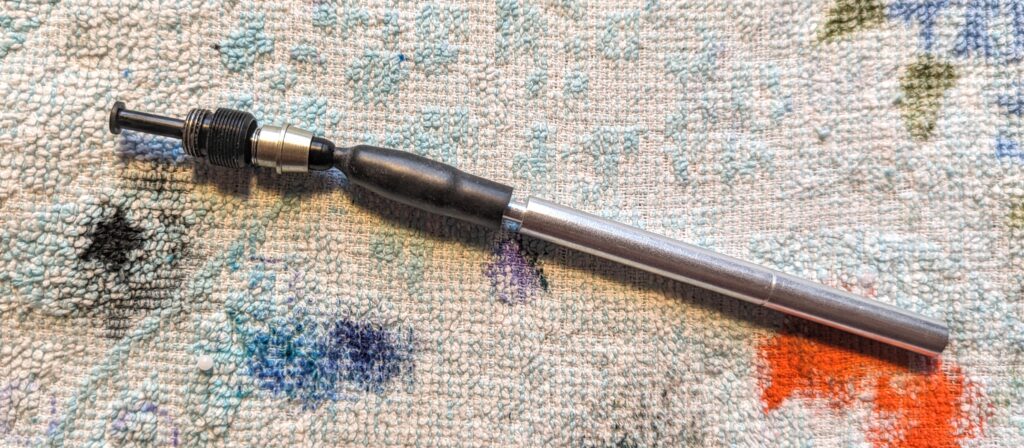
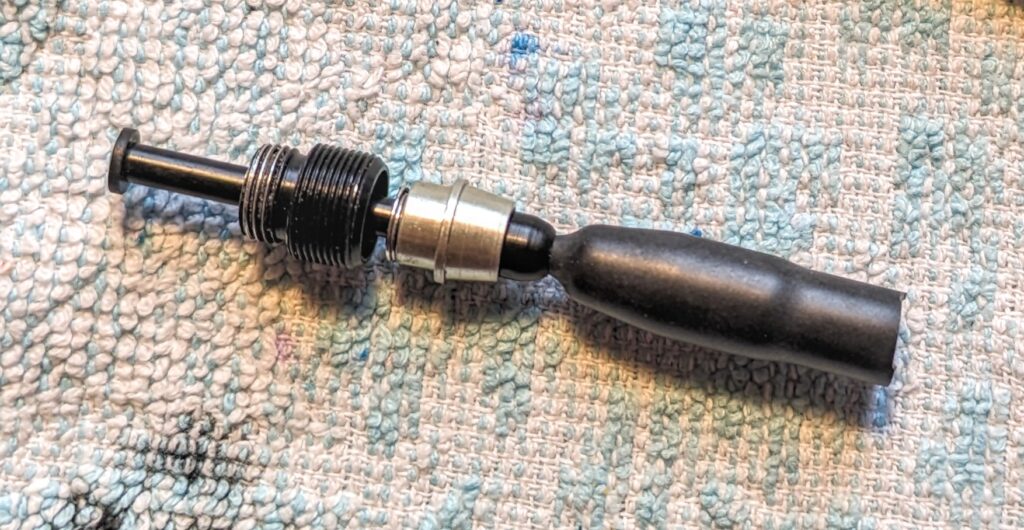
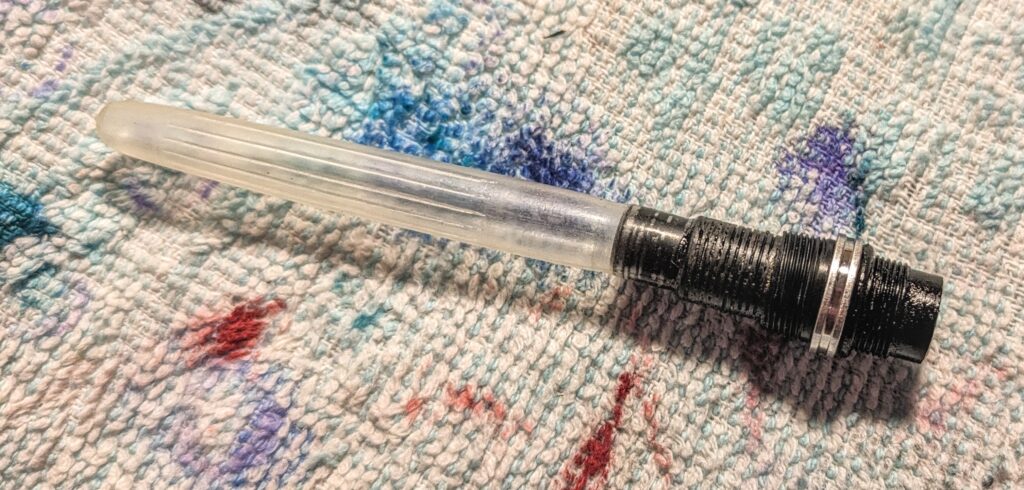
I put some chalk on the sac, turned the opening inside out, and folded it back so that it lay over the tip of the pump. The sac is not glued on here, because when the pump is screwed into the pen, it is sandwiched between this tip and a small edge inside the pen body, and held in place without the need for glue. When you press the button at the end of the pen, the diaphragm pushes down, and when you release it, it goes back. This is what creates the vacuum in the pen, so that it can fill with ink.
When this was done, I put some silicone grease on the sac, and screwed the pump back into place in the pen, using the vacumatic wrench again. You can test whether the pump has a tight seal before screwing in the grip section. Dip a finger in water, and hold it over the opening, press the pump a couple of times, and feel if you get suction against your finger. If the finger doesn’t stick to the opening, you don’t have a tight seal, and should check if you have done everything correctly with the pump and the diaphragm before assembling the rest of the pen.

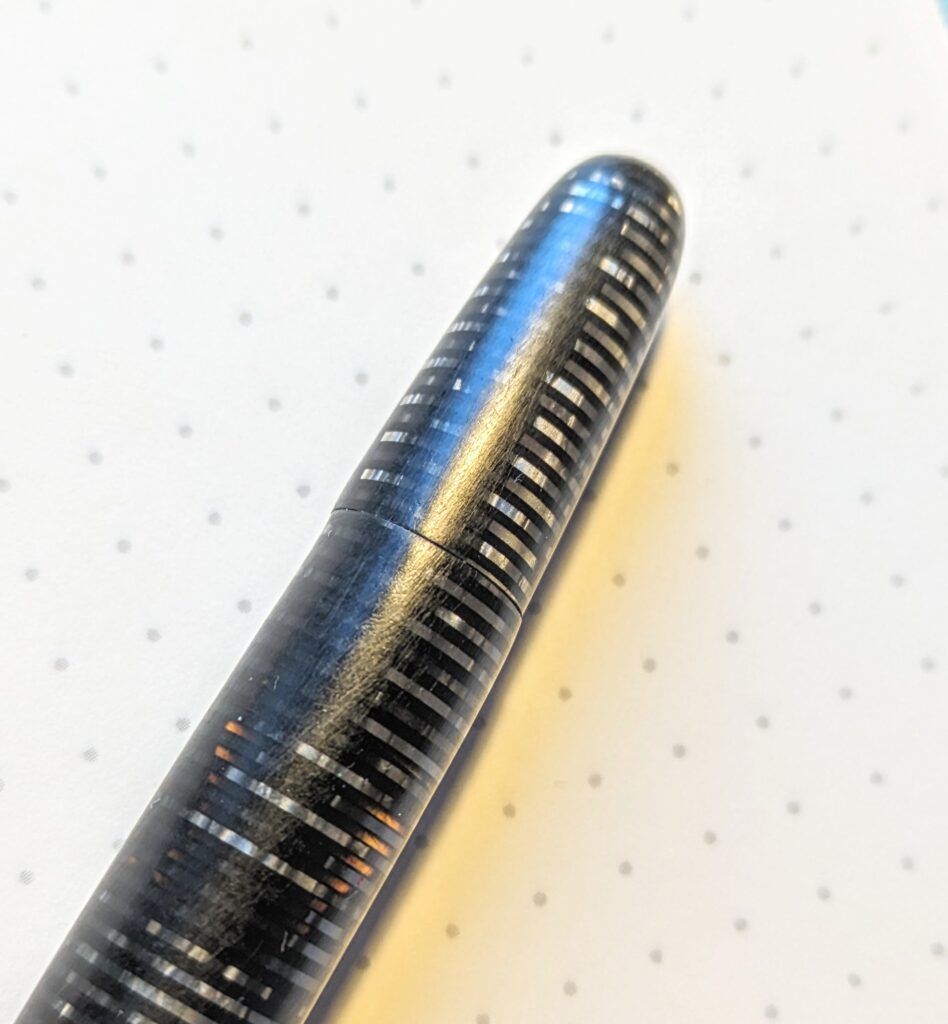
Blind cap
Apparently, it’s a fairly common problem that the blind cap does not line up properly with the pen body when you’ve put in a new pump. In the repair kit that Parker used to send out to Vacumatic repairers back in the old days, they often included micromesh that could be used to grind down the little edge between the pen barrel and the blind cap. I tried to do this on my pen, and worked on it for quite a while without really getting the results I was looking for.
In my case, it turned out to be more than just a small edge. It seems that the new pump mechanism is slightly crooked, which means that the blind cap will not be quite right no matter what I do. The micromesh treatment helped a bit, but in the end I just decided it would have to be good enough. The pen works as it should, and it’s useful for me anyway to have a sort of “beater” Vacumatic I can use to practice repair procedures.
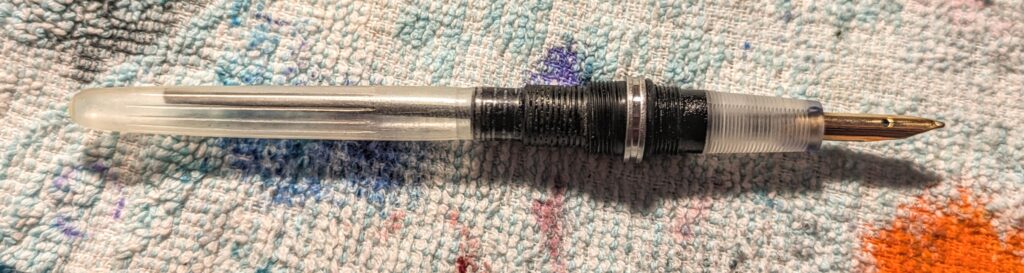
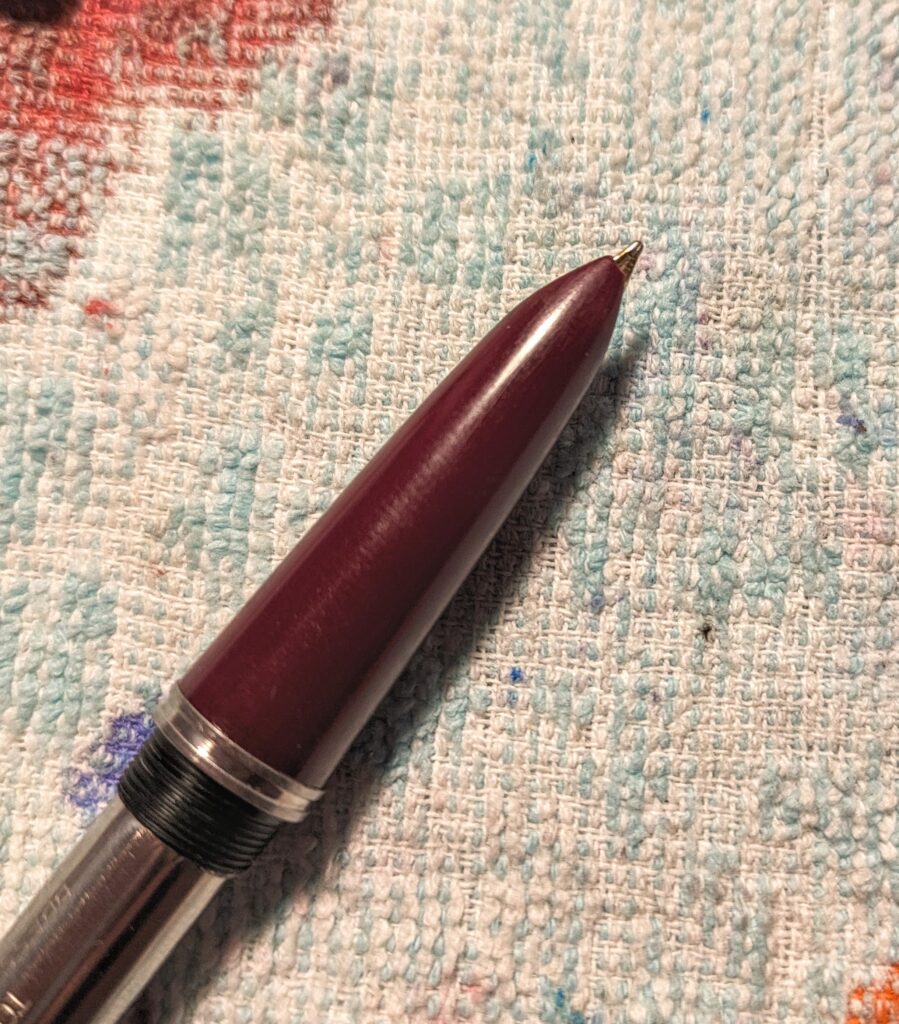
The nib
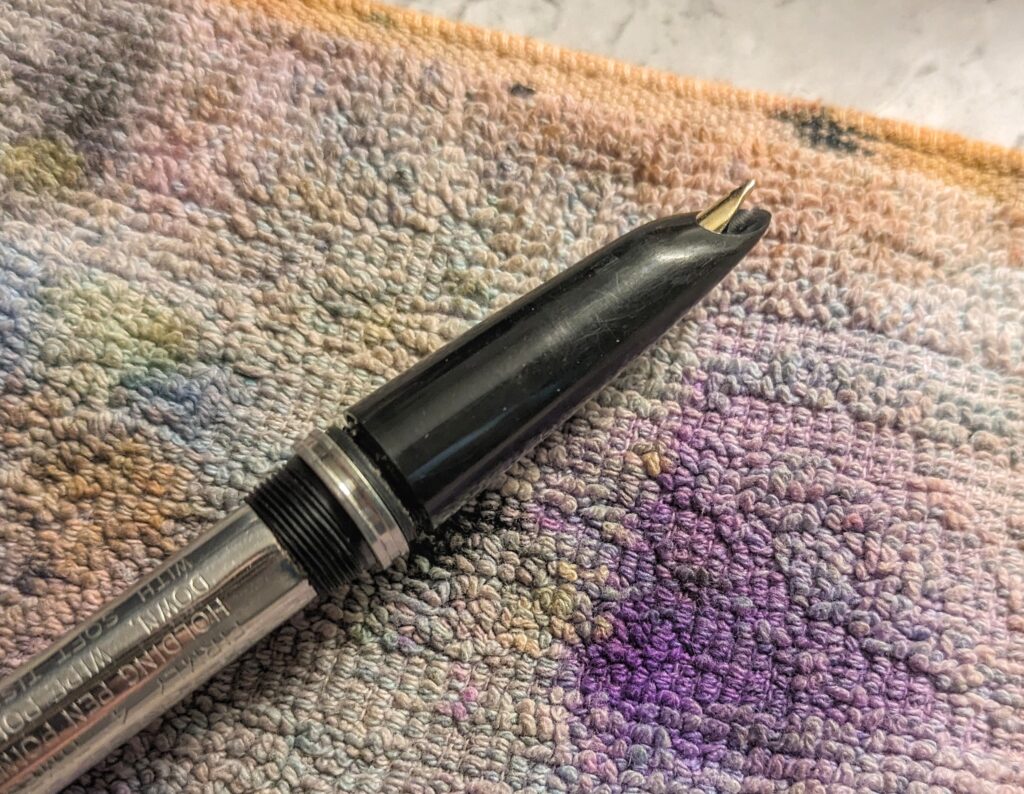
Then I made a stupid mistake: I wasn’t able push the nib and feed all the way into the nib section when I reassembled it. It was simply too tight. After fiddling with it for a while, I thought I had pushed it in far enough that it was fine, although it was still maybe a millimeter further out than it had been previously. I filled the pen, wrote a few words with it, and put the cap on. I got a strange resistance when I screwed it on, and when I took it off again to investigate, I discovered to my great horror that the nib had caught the top of the cap, and had bent… I didn’t think the margins would be this small, and didn’t expected it to matter that much that the nib was just a tiny bit further out than it had been. You learn as long as you live…
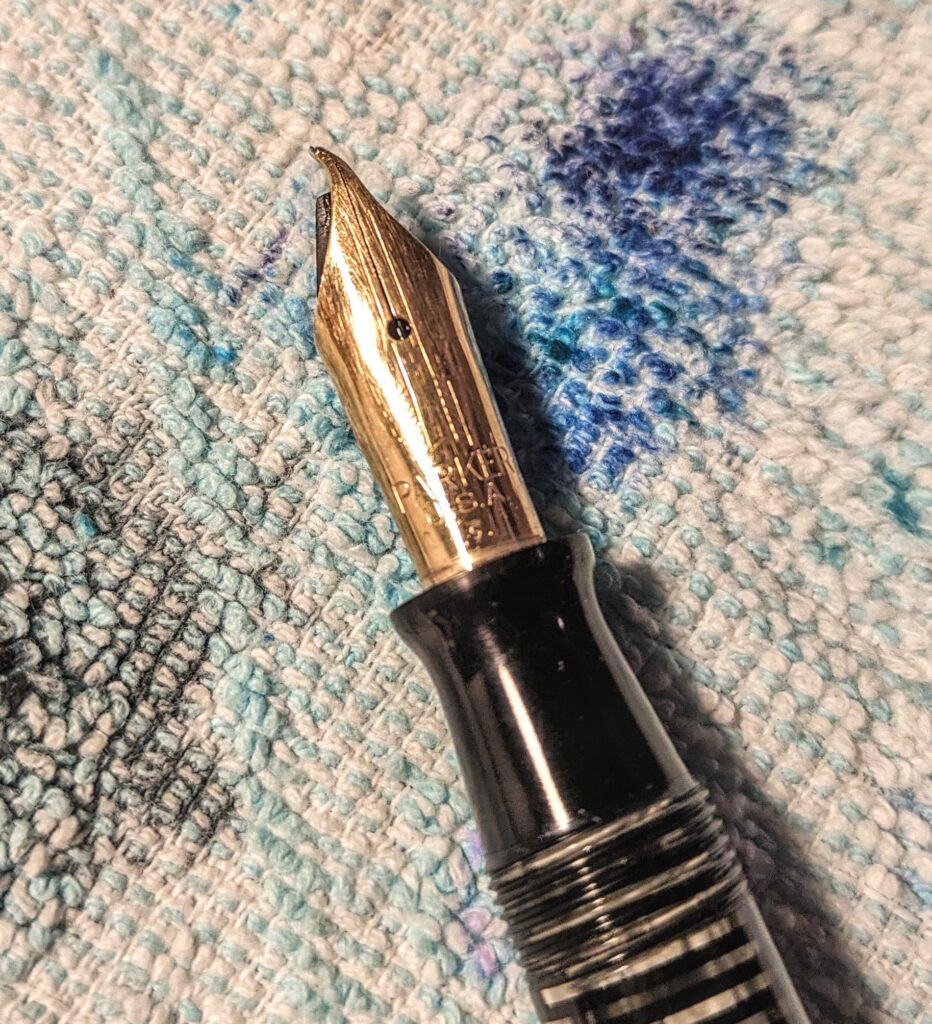
So I still wasn’t quite done with repairing this pen. I’m not very good at straightening nibs, but I made an attempt to bend the tines back again, and in the end I luckily succeeded reasonably well with it. It was clear though, that I also had to get the nib all the way into the section. I then did what I should have done to begin with: I put the whole section, with nib and feed, in warm water for a while. After warming up the materials a little, they became softer and more pliable, and it was possible to get the nib positioned correctly.
It took me quite a while to fine tune the nib again. I finally got it back to about where it had used to be, and got it to write without it scratching too much. I might need to make a few more minor adjustment to it, but for now I am happy with how it writes. And mostly just relieved that it writes at all, after this little extra detour…
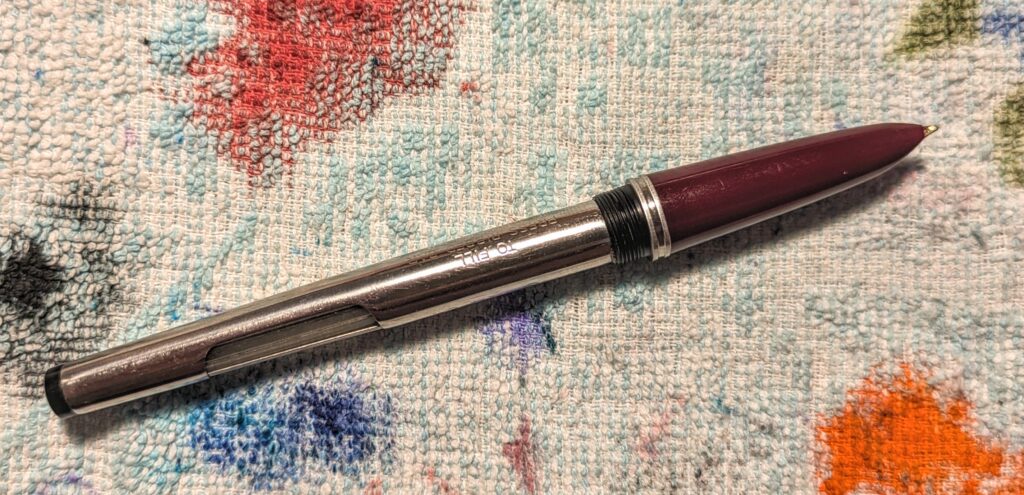
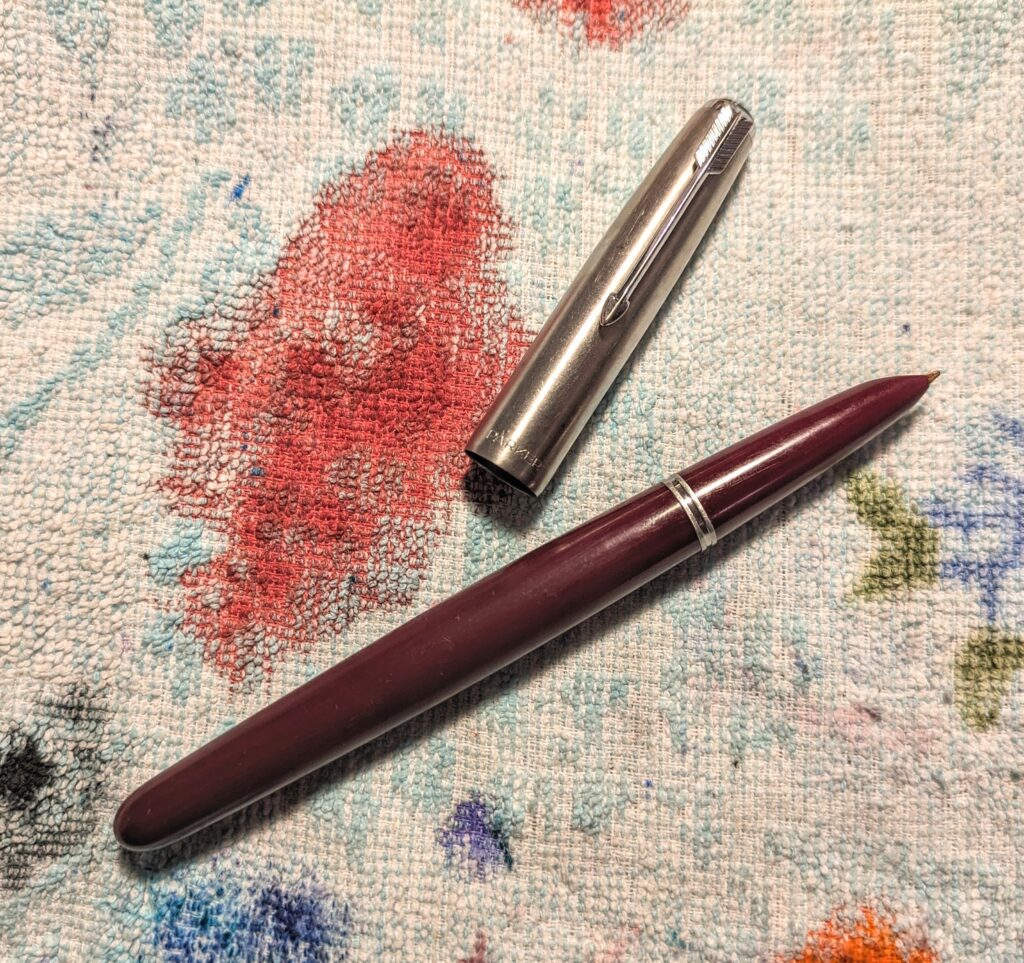
Parker 51
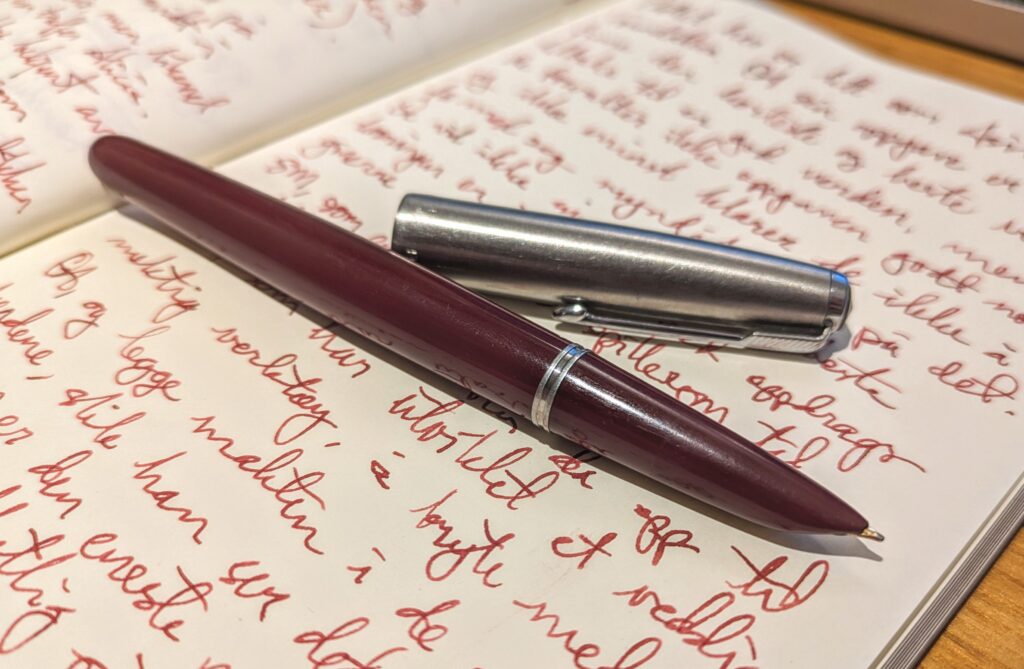
I have three Parker 51s in my collection. I’ve had one for a number of years now, and I’ve used it to teach myself how to disassemble and repair these pens. A couple of years ago I found two more at an antique shop in Trondheim: one black and one burgundy.
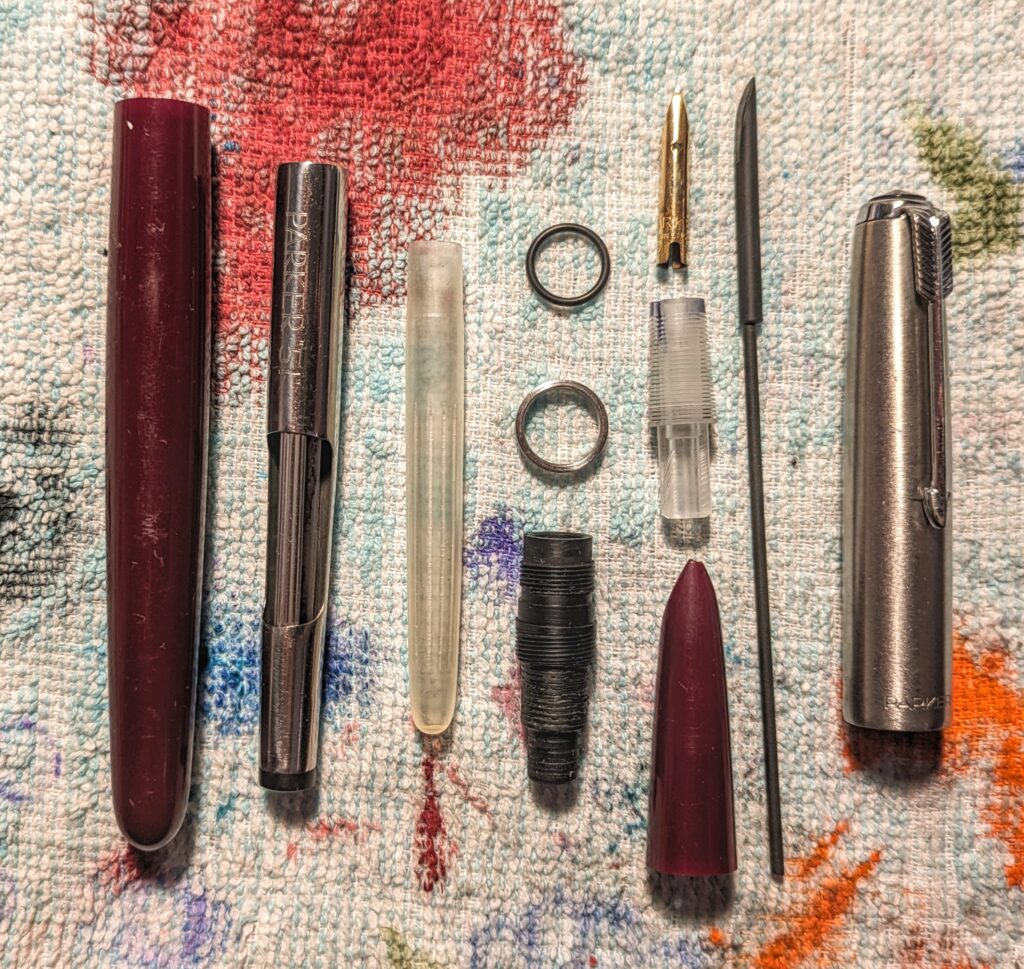
I love the color of the burgundy pen, but the nib on it was broken. At the same time, the clip had broken off on the black pen. It was clear to me that these two should be combined into one complete and working pen, by moving the nib from the black pen over to the burgundy one. But they have been in a box since I bought them, and I just procrastinated it away, again and again.
Dismantling
The filling mechanism in these pens is not unlike the squeezy converters that come with modern Pilot Metropolitan pens, and initially doesn’t appear to be very complicated. However, when you get into it, the Parker 51 pens have a surprisingly complex construction, and consists of many more parts than you would think. There are also several aspects to them that can lead to some head-scratching when repairing it.
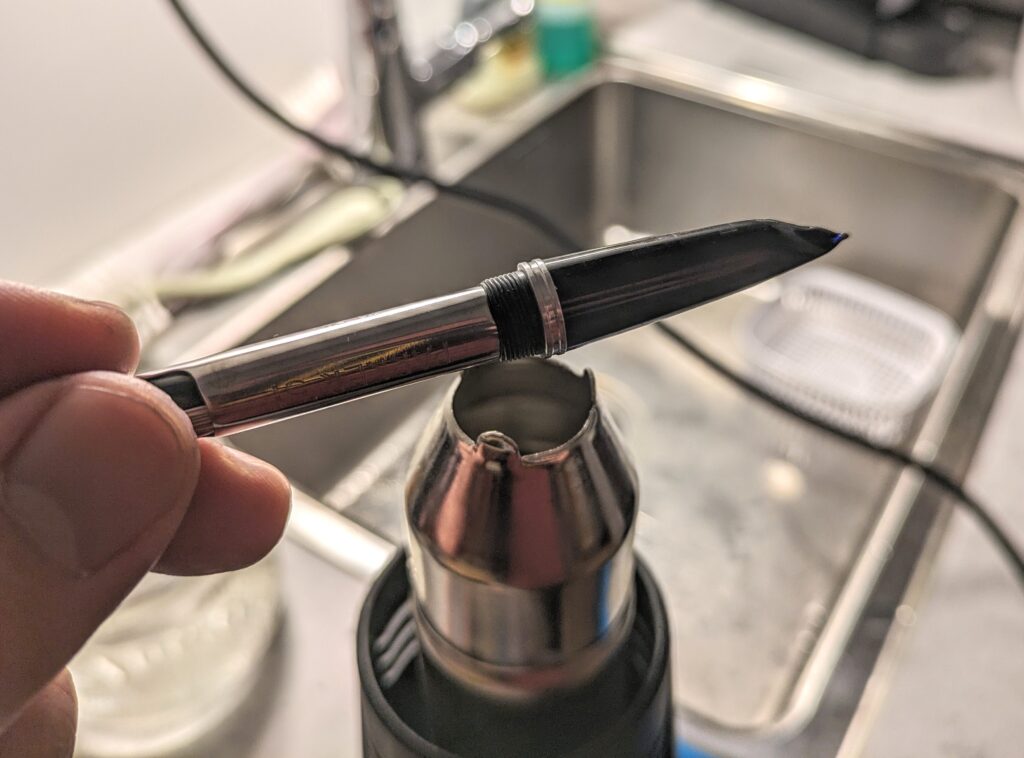
Disassembling the Parker 51 is relatively easy, but you have to use heat a couple of times to loosen parts that are glued on. This applies to the grip, or shell, which also covers the nib assembly. The shell is usually glued in place, so you have to use the heat gun here.
If you need to change the ink sac on this pen, a sac protector is mounted on the outside of it. This is a metal sleeve with a built-in pressure bar that you push in to fill the pen. You have to use heat to loosen the protector as well, so that you can get to the ink sac. The sacs used by Parker were made of a material called “Pli-glass”, which I believe was silicone based. This is a very durable material, and it’s rare that they actually need to be replaced. I’ve done it on this pen mostly to show how, but it wasn’t really necessary.
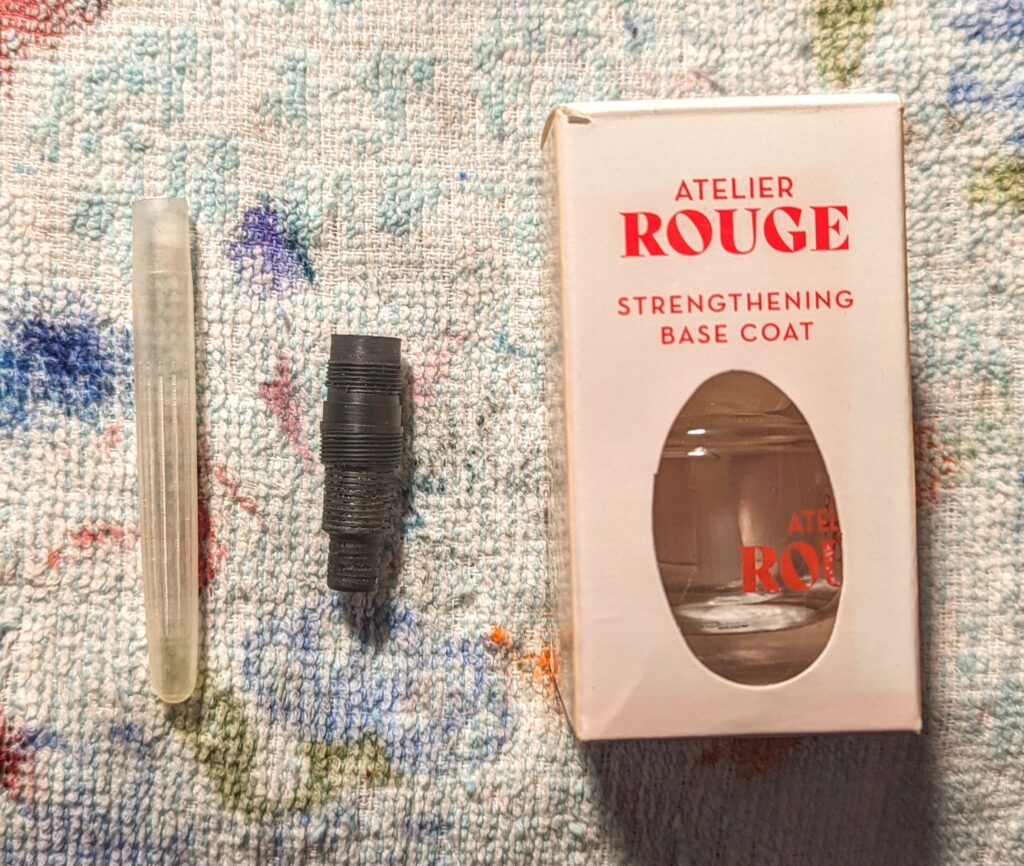
The collector can simply be pulled straight out, and the same applies to get the nib and feed out of the collector. The sac can also be warmed up with a heat gun to soften the glue that holds it in place, so that it comes off more easily. In addition, you can remove the metal ring on the connector, which is the part you are left with when everything is dismantled, and that all the other components are attached to. I’ve also seen this part refered to as the “foundation unit”. The metal ring is held in place by an o-ring which is there to prevent leaks out through the edge of the grip section. The O-ring can weaken over time, and it’s probably a good practice to just change it whenever the pen has been taken apart.
Install new sac
This is a simple operation. The ink sacs for Parker 51 come in the right thickness and length, so you don’t have to cut them, as you often have to with other fountain pens. It can be attached to the connector with either shellac or clear nail polish.
Nib and feed
In this case, I needed to replace the nib, so I also had to disassemble the other Parker 51 pen I had to get the nib out.
The feed can be a bit tricky on the Parker 51. It consists of two parts: the feed itself, and a long breather tube that sticks out at the back, and goes through most of the ink sac. The tube ensures that the air flows in and out, and without it, it could be difficult to fill the pen properly. The original breather tubes are made of a material that gets quite brittle over the years, and they tend to break off right down at the edge of the small hole they are fitted into on the feed. You can buy new breather tubes, but then you have the challenge of getting the remains of the old one out of the feed, so that the new one can be installed. It can be done with a small hand drill, but I’ve found that it’s pretty difficult to find one in the right width. It should be 1.1 mm. The drill sets I have found that are thin enough jump from 1.0 (which is too thin) to 1.2 (which is just a little too wide for the new breather tube to fit well). Fortunately, you can also buy new feeds with breather tubes already installed. It’s definitely an easier solution, and well worth the small extra cost, so that’s what I did with this pen.
Assembly
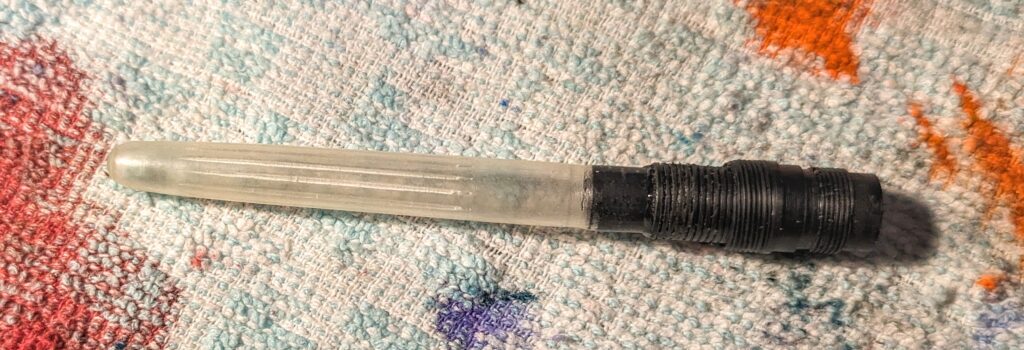
The first thing to do is to install the metal ring and a new o-ring on the connector unit. You can buy o-rings in the right size for these pens. It should be well lubricated with silicone grease, and then mounted right up to the metal ring, to hold that in place.
Assembling these pens is relatively simple. The nib and feed are pushed into the collector, which is then pushed into place in the connector unit.
The protector is pushed into place around the ink sac. It can be glued on with shellac or similar, if it is a little loose.
The shell is then screwed into place. When that’s done, you quickly see if you’ve managed to orientate the nib correctly. Usually you have to unscrew the shell a few times and turn the collector a little to get the two to line up. It’s worth spending some time on this, so that the nib lines up perfectly.
Finally, just assemble the pen body, and you’re done!
Result
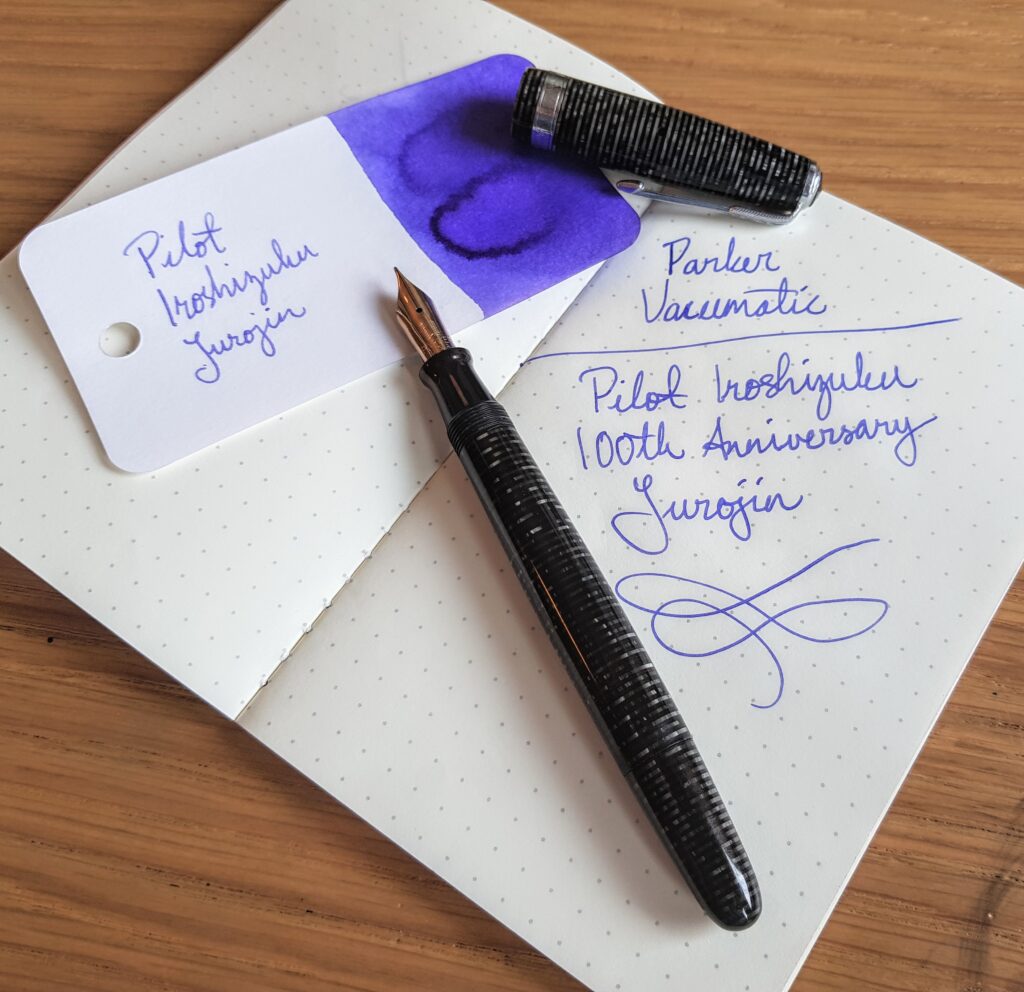
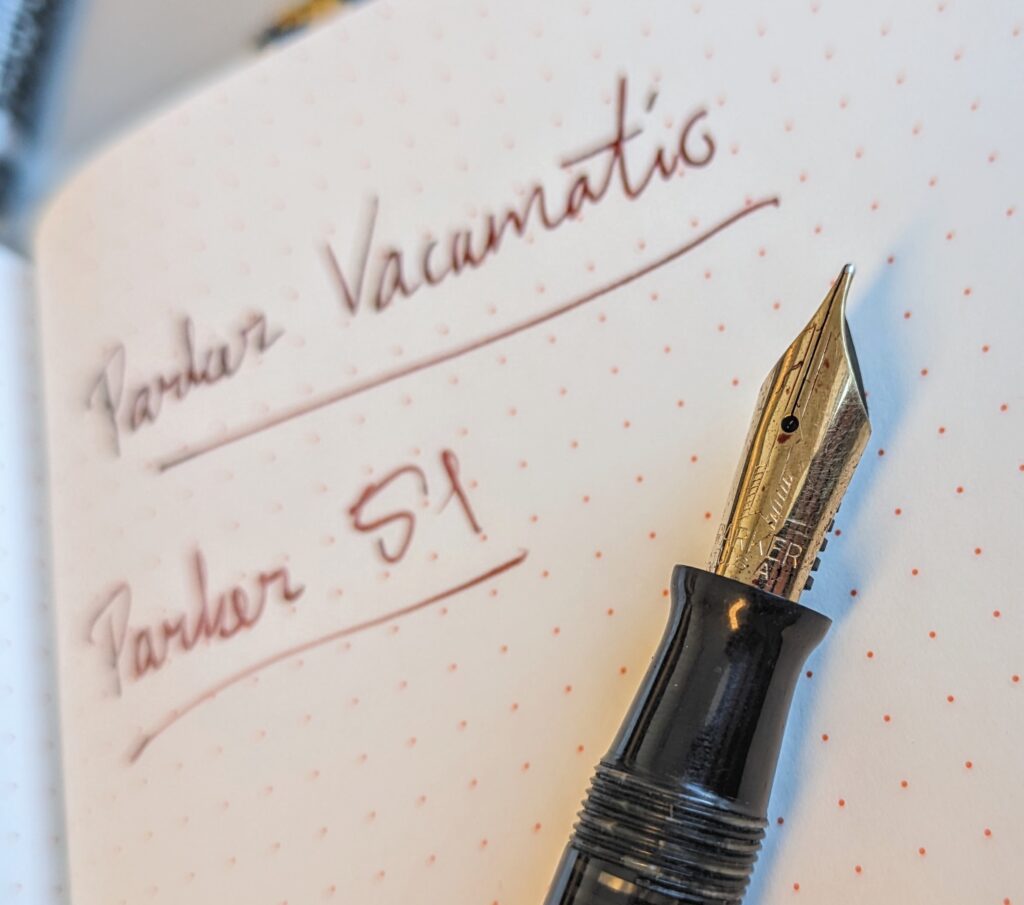
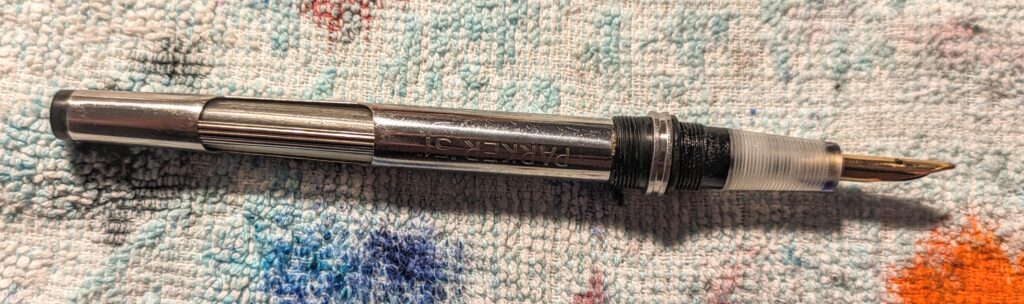
All in all, I’m very happy that I finally got these repairs done. I wish the blind cap on the vacumatic had been a little more flush with the rest of the pen, but it’s alright. This nib also scratches a bit now after I the incident with the cap, but that should be a relatively simple matter to fix. Apart from that, it writes very nicely with a very reliable ink flow, and the blind cap sits much better than it did, even if it is a little crooked.
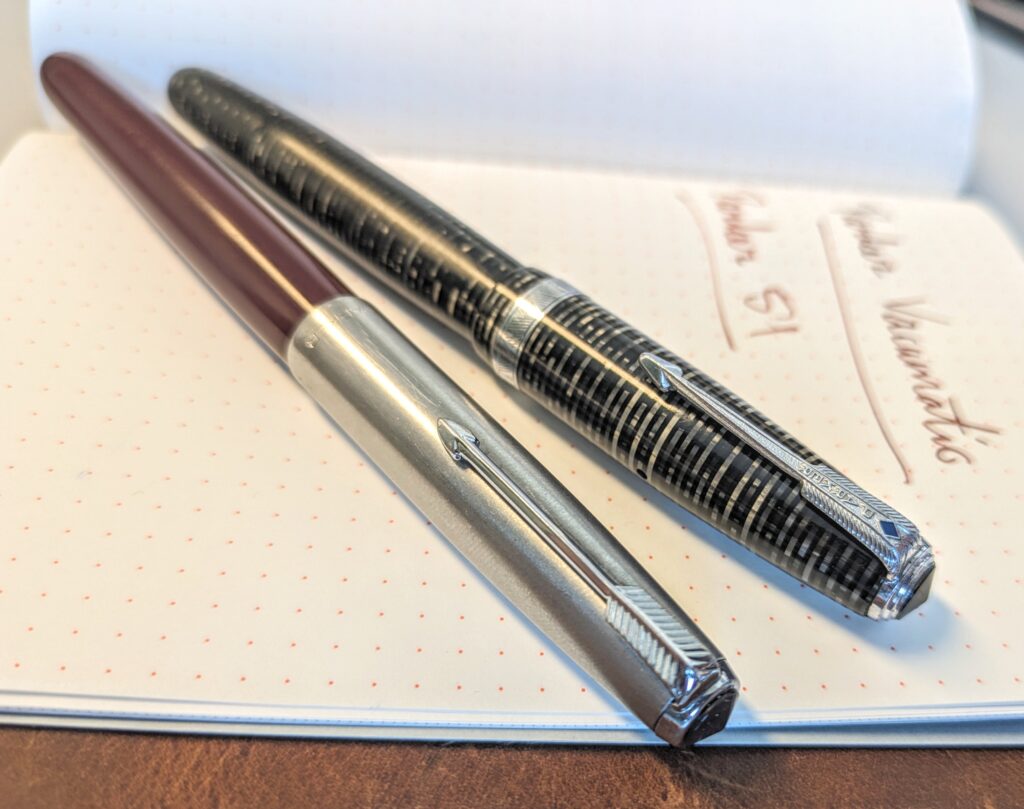
The 51 pen pleasantly surprised me. I think it writes quite a bit better than my other 51 pen. The other has a very narrow sweet spot where it writes well, and if you don’t hit this angle, almost no ink comes out at all. This is quite common on the Parker 51 pens, I understand, but the burgundy pen has a much wider sweet spot, and doesn’t feel as restrictive when I write with it.
I discovered that there’s a tiny bit at the very tip of the shell that has broken off on this one, but it’s almost impossible to see, and it doesn’t do anything to hurt the writing properties, so it doesn’t bother me. This pen is so good to write with that I think I’m actually going to put it into my regular pen rotation, even though I usually prefer to write with newer pens.
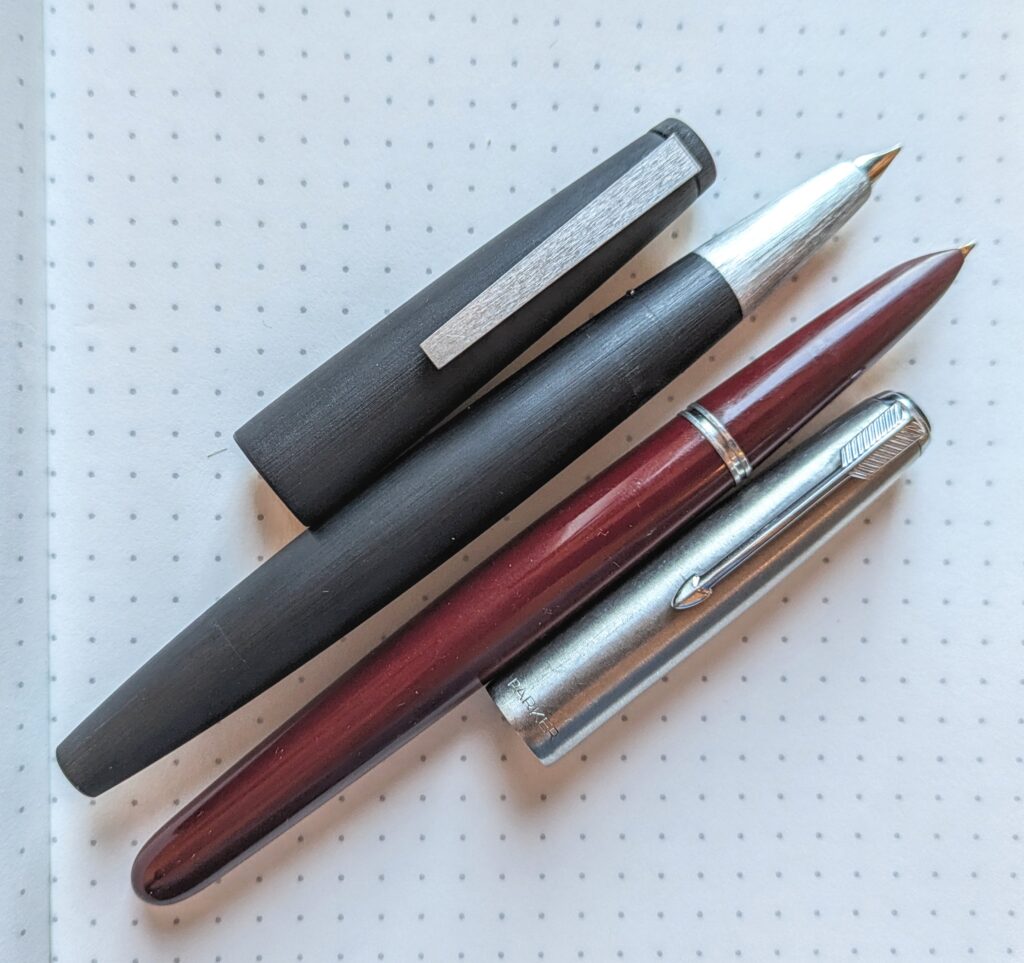
I think this will make an excellent work pen, along with my new Lamy 2000. They have many similarities, both aesthetically and functionally.
All of the parts and tools I’ve used to repair these pens have been purchased from The Pendragons. This is not a paid advertisement, but it is a good shop with great expertise, and I always recommend it to those who intend to get into pen restoration.
4 thoughts on “Nibby Sunday – Service and restoration of Parker Vacumatic and Parker 51”
Great work, excellent description of the process. I read with very much interest. Vic, from Portugal
Thank you! 🙂
Hi Anders, You did a good job on these two vintage Parker fountain pens. I am glad that I am not the only one who makes mistakes and then learns by trial and error. It must have been a shock to see the twisted nib on the Vacumatic, after capping the pen with the nib not quite fully inserted. You did well to fix it afterwards!
Thank you, Rupert! Yes, at first I didn’t really understand what had happened. And then I feared that the hours I’d already put into restoring the pen had all been for nothing. Thankfully, I managed to fix it again. Failing is the best way to learn, though, and it’s much better to do mistakes with my own pens, than with pens I’m repairing for other people.